
Needle Felting Flat Shapes: A Step-by-Step Tutorial
Updated: Nov 2
Last Updated: October 28, 2026
Quick Summary
Flat shapes are built by felting thin, even layers of fine wool with a barbed needle on a foam mat, starting with a simple silhouette. Place parchment or mesh under the wool so it does not fuse to the mat, and work the needle straight up and down until the fibers lock together.
Use a Size 36 needle to bond the first layer and a Size 38 or 40 for the surface pass.
Use a dense foam mat about 1 inch thick so the piece can be lifted and repositioned.
Add thin layers rather than one thick layer, since thick layers leave a loose core.
Build a scene back to front: background first, then midground, then foreground details.
Keep a spare needle on hand, because felting needles snap at the barb.
Table of Contents
What Flat Needle Felting Is and Who It Suits
Flat needle felting is the technique of using a barbed felting needle to bond thin layers of wool into a flat, picture-like piece, rather than sculpting a three-dimensional figure. Nome Schoolhouse is a restored 1916 landmark that runs a working fiber processing mill.

Best Wool Roving for Needle Felting: A 2026 Buyer's Guide
Flat work suits beginners well. You build a shape by spreading wool into a thin layer, then poking it until the fibers lock together. There is no stuffing or armature to manage, which makes it a forgiving first project for anyone new to fiber arts.
It also suits people who want a finished piece they can frame, hang, or stitch onto a bag. If you enjoy small, quiet handwork and want a result that looks like a painting made from wool, flat felting will feel natural to you.
Needle Felting Supplies for Beginners
Flat work is unforgiving of the wrong tool, so the supplies list matters more here than in three-dimensional felting. For a ready-made practice set, see the landscape coasters quick kit that lets you try layering a flat scene. Plan on the following:
Felting needles. Needle gauge runs on the industry scale where a higher number means a finer needle. For thin, flat shapes, most practitioners reach for a Size 38 or Size 40 triangle needle for the surface pass, and a coarser Size 36 for the initial bonding layer. A fine needle leaves smaller holes and a smoother face; a coarse needle felts faster but leaves a rougher surface that shows through thin wool.
A felting mat. Use a dense foam mat roughly 1 inch thick so the needle has something to push into without striking your bench. Foam mats are the standard for flat work because they grip the wool lightly and let you lift and reposition the piece. A brush mat is an alternative, but its bristles can leave a textured back on thin shapes.
Felting wool. Choose fine wool in the colors you need. Wool roving that is clean and evenly carded spreads into a thin, even layer more easily than batts with clumps. For flat shapes, a fine merino or corridale roving is easier to control at the edges than a coarse breed.
A needle holder. A single-needle pen holder keeps your needle steady and comfortable during long sessions. A multi-needle holder lets you work with one to six needles when you move on to larger background areas. A multi-needle holder speeds up large background areas but is harder to control on small shapes and edges.
A foam pad or parchment sheet. A thin sheet of parchment or a piece of tulle mesh placed between the wool and the mat is the single most useful accessory for flat work, because it prevents the shape from fusing to the foam.
Nome Schoolhouse offers unique needle felting kits. Check the website for current prices.
Pro Tip Keep a spare needle on hand. Felting needles are brittle and snap at the barb, usually right when you are working a tight edge. A broken needle left in the wool will scratch your mat and your work.
Watch Out Work with the needle pointing down and away from your fingers, and keep your mat on a stable surface. A glancing stab into a fingertip is the most common beginner injury in flat work because the wool layer is thin and your hand sits close to the work.
The supplies that matter most for flat work, at a glance:
Item | Recommended | Note |
Surface needle | Size 38 or 40 triangle | Fine needle leaves smaller holes and a smoother face |
Bonding needle | Size 36 | Coarser needle felts faster but leaves a rougher surface |
Felting mat | Dense foam, about 1 inch thick | Grips wool lightly and lets you reposition the piece |
Wool | Fine merino or corridale roving | Spreads into a thin, even layer and is easier to control at edges |
Release layer | Parchment or tulle mesh | Prevents the shape from fusing to the foam |
Choosing Shapes and Transferring Your Outline
Start with a simple silhouette: a heart, a leaf, a cloud, or a small animal with a clear outline. If you want to go further with color, blending techniques for beginners explain how to shade wool across a flat piece. Simple shapes teach you how the wool behaves at the edges, which is where most beginners struggle.
Draw your shape on paper at the size you want, then cut it out to use as a template. Place the template on your felting mat and lay your wool over it. Some felters trace the outline lightly onto a piece of stabilizer, which holds the shape while you work.
Keep your first shape small, about the size of your palm. A small piece finishes faster, so you see the whole process from start to end in one session.
Needle Felting Wool Tightly Layer by Layer
The core technique is building density in layers. Pull a thin, even sheet of wool from the roving, roughly the thickness of a sheet of paper, and lay it over your template. Then work the needle straight up and down through the wool, not at an angle, until the fibers begin to catch.
Add a second thin layer and repeat. Thin layers felt more evenly and tightly than one thick layer. A common mistake is adding too much wool at once, which leaves a loose core that never firms up. If the surface feels soft when you press it, the wool underneath is not yet bonded.
Work the entire surface, not just the center. Move the needle in small, even stabs across the whole shape until the piece holds together when you lift it from the mat.
Preventing Your Shape From Felting Into the Mat
One problem catches many beginners: the wool fuses to the felting mat and you lift a piece that is stuck to the foam. To prevent this, slide a sheet of parchment or a thin piece of mesh under the wool before you begin. Keep the needle moving so it does not pierce the mat in the same spot repeatedly, and rotate the piece every few minutes.
Needle Felting Flat Scene Tutorial: Building a Picture
Once you can make a single shape, you can build a scene. Start with the background, such as a sky or a hillside, and felt it first. Add midground elements like trees or fences next, then foreground details last. Working back to front keeps the layers looking like depth rather than a pile of pieces.

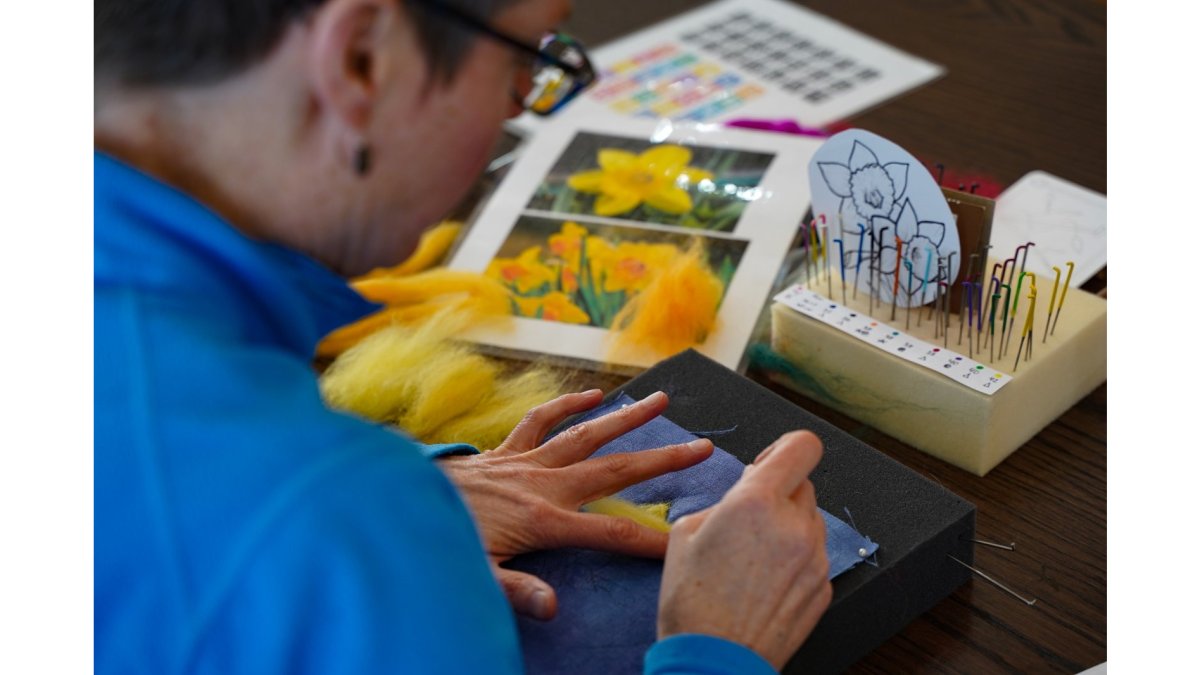
Students doing needle felting in a class
Hands holding a felting needle over a small wool landscape on a foam mat make a clear visual reference for this stage. Keep each element thin and let neighboring colors blend slightly at their edges, which creates a painterly effect.
Getting a Needle Felting Smooth Surface and Clean Edges
A smooth finish comes from consistent needling and a final light pass. Use shallower stabs over the surface once the piece is firm, so you compact the top layer without pulling fibers loose. Check for bumps and press them down gently.
For clean edges, go around the outline with the needle at a slight angle, pushing the fibers inward. This tightens the border so the shape looks crisp. Trim any stray fibers with small scissors once the piece is fully set.
Troubleshooting Lumps, Holes, and Curling
Most flat-shape defects trace back to one of four causes: too much wool in one spot, uneven needling, an unbalanced edge, or a piece that was never fully bonded. Work through the symptom you see rather than guessing.
Lumps and bumps. A lump almost always means too much wool went in one spot. Lay a thin piece of wool over the bump and needle it lightly so the new fiber blends into the high point.
Holes and thin spots. Holes come from working too hard in one place, which pulls fibers apart rather than bonding them. Add a little wool to the gap and needle it in gently with a fine needle. If the hole is at an edge, rebuild the border before you fill the center, because edge fibers migrate inward as you work.
Curling. Curling happens when one side has more density than the other, so the tighter side pulls the piece into a cup. Securing the edges against a rigid surface provides a permanent solution to this tension, and framing your finished work ensures that your design remains perfectly smooth for years to come.
Uneven or fuzzy edges. The cause is usually an unfinished border. Return to the outline and felt it again with the needle at a slight angle, pushing the fibers inward. Trim stray fibers with small scissors only after the border is firm, not before.
Thickness that varies across the shape. This is the most common defect in flat work and the hardest to fix after the fact. The fix is preventive: build the shape in thin, even layers and check thickness by pinching the piece between thumb and forefinger every few passes.
Key Takeaway If a flat shape will not firm up no matter how long you needle it, the problem is almost always a loose core from too much wool added at once. The only reliable fix is to pull the piece apart and rebuild it in thinner layers.
Preventing the shape from felting into the mat. Slide a sheet of parchment or a thin piece of tulle mesh under the wool before you begin. Lift and turn the piece every few minutes, and keep the needle moving so it does not pierce the mat in the same spot repeatedly. If the wool starts to grip the foam, stop and reposition the mesh before continuing.
Finishing Your Flat Felt Piece and Booking a Hands-On Workshop
When the surface is smooth and the edges are firm, your flat shape is finished. You can frame it as is, or backstitch it onto a piece of fabric for a softer finish. Give it a gentle press with a pressing cloth and a hot iron on low heat to set the shape.
Nome Schoolhouse offers fiber arts workshops in its restored schoolhouse.
Frequently Asked Questions
How do you needle felt a flat shape?
Lay a thin, even layer of wool roving on your felting mat and gently poke it with a fine felting needle, working from the outside in. Keep the layer thin so the needle can grip all the fibers, and stop when the shape holds together when you lift it. Flip the piece and felt the back to lock the fibers, then shape the edges with small, controlled pokes. Repeat with additional thin layers until the piece is firm enough to handle.
What supplies do you need to needle felt flat shapes?
You need wool roving in the colors you plan to use, a felting mat made of dense foam, and a set of felting needles in a fine gauge for detail work and a medium gauge for building up color. A pair of small scissors helps trim edges, and a template or drawn outline keeps proportions consistent.
How do you keep a needle-felted shape flat?
Keep every layer thin and poke evenly across the whole shape rather than concentrating on one spot, since dense patches are what cause a piece to bulge. Felt both sides of the piece, and press it under a damp pressing cloth with a hot iron once it is firm to smooth out any ridges. Flatten the shape gently between your palms before finishing, and check it against a flat surface to confirm it lies evenly.
Can beginners make flat needle-felted pictures?
Yes. Flat pictures are one of the most approachable needle felting projects because they use simple shapes, thin layers, and a limited number of colors. Start with a basic scene such as a hill, a sun, and a few flat animal shapes, and build confidence with each layer before adding finer details like ears or eyes.

This is a lovely tutorial for anyone who enjoys working with felt and exploring creative designs. Handmade shapes can also be a great source of inspiration for personalised clothing decorations. For anyone looking to customise jackets, bags, or uniforms, iron patches Ireland offers a practical way to add colour and personality to everyday items.